Exhaust On & Off
Pokie Parmidge
January 2004
Doesn't matter why, but at some point or another you are going to want or need to take off your exhaust system. This is how I took mine off and put it back on. If you've never taken off you Cruiser's exhaust system, there is only one really important rule to remember,.... do it when the system is cold!
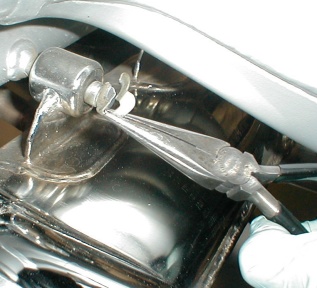
I started off removing the two circlips on the frame just above the muffler crossover with a pair of needle-nosed pliers.
|
Removing the circlips. |
Put a drop of oil or silicone spray on the pins of the frame the muffler hangs, this will allow the rubber mounts to slide off with ease.
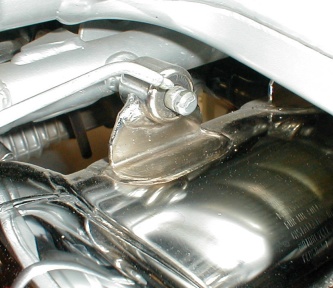 |
A drop of oil may make all the difference. |
Next I like to get the O² sensor off while the mufflers are still being held tight. I use a 22mm open end wrench to just break the sensor loose. Before trying to undo the sensor, I'll take a felt pen and put a mark on the side of the sensor. This way I can count the turns it takes to unscrew the sensor. Then I'll write down on a piece of paper how many turns it took to undo the sensor (mine was 4 full turns). This information is good when it comes time to put the sensor back on. I then unscrewed the sensor (allowing the wires to just twist up).
To protect the O² sensor from possible contamination, I slipped it into a plastic bag and put an elastic band around it.
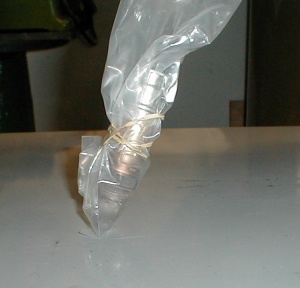 |
It's in the bag. |
Because of possible burnt on crud, before I try to loosen the clamps at the mufflers, I gave the threads a spray with some penetrating oil (or WD-40 would do). Then with a 15mm socket on a ratchet I undid the clamp nut (the nut doesn't have to come all the way off but I always loosen it more than it actually needs) until the clamp is loose and floppy. With the clamps loose, I sprayed penetrating oil into the area where the header and muffler come together (this helps the headers slide out of the mufflers).
Working my way forward, next I loosened the 4 nuts where the header pipe meets the heads. I like to use a 13mm deep socket on an extension here as the deep socket is less likely to damage the chrome on the header nuts. Under each nut there is an 8mm wavy washer, I kept these with the nuts in a box as they will have to go back on. Ever wonder why it's a wavy washer? The pressure of the spring action of the washer helps to lock the nut and stop it turning on its own. I like wavy washers, regular split lock washers tend to gaul and scare things up coming off.
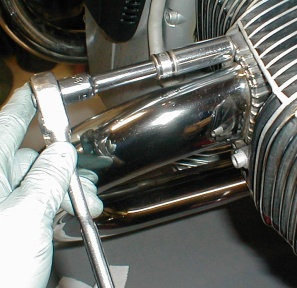 |
Deep socket for the header nuts. |
Now that all the pieces of the exhaust system are loose, just by wiggling each piece should allow the system to come apart. If my system had been on for a lot of miles or assembled without any anti-seize on the joints, a lot of wiggling, pushing and pulling would be needed. I'm always tempted to use a rubber or dead-blow hammer to take apart an exhaust system but as careful as I try to be, one or two dents are usually the result. It often helps to slide the whole system forward to give more wiggle room, but sadly, there just isn't enough room to get to whole system off by sliding it forward.
When the muffler is loose and ready to come off, I'll put some blocks covered with rags under it. I just never seem to be in the right position to handle the weight of the muffler when it comes off so the blocks and rags stop it from getting damaged when it falls off. How heavy? Would you believe 22 and a half pounds!
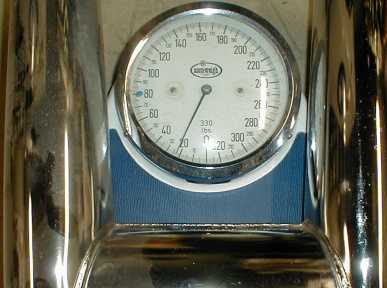 |
I wasn't kidding, 22 and 1/2 pounds! |
With my whole exhaust system off and sitting on the bench, I just can't resist polishing the whole thing piece by piece. It looks so nice when it goes back on, looks very detailed. When I got to cleaning the muffler clamps, I removed the nuts and coated the threads with anti-seize.
 |
Anti-seize on the threads. |
Refitting the Exhaust System
When it's time to put the exhaust system back on I'm already thinking about how much trouble it's going to be to get it off! The thought of needing to get the exhaust system off again causes me to make sure all the joints and fasteners get a coat of anti-seize while they are going together.
 |
Anti-seize. |
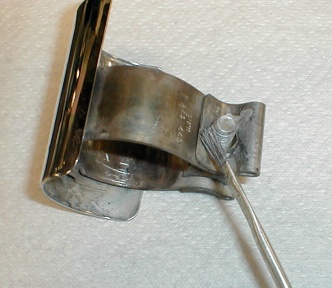
Putting the exhaust system back on I find works best working from the back going forward, so first thing, hang the muffler back on the frame pins. I slipped the circlips on to help keep the muffler from doing too much moving around. Next I slid on the muffler clamps. I've been looking at the muffler clamps, they both have the same part number stamped on them and nothing else. The funny thing here is they are not the same, they are in fact mirror images of each other! Can you imagine trying to order a left or right for your bike when somebody along the way (like the dealer or supplier) has gotton them mixed up? I'm not even going to think about that right now.
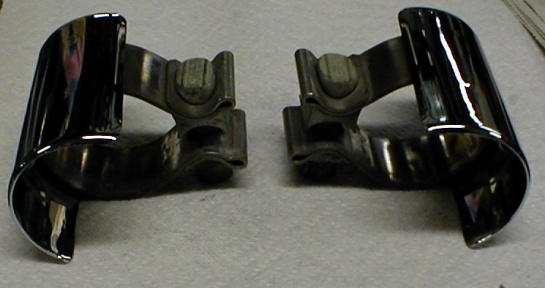 |
Mirror image muffler clamps. |
Using my reasoning abilities (do I really have those?) holding the clamps up one at a time, the stud or threaded area faces down and the clamp will need to be at the front of the header/ muffler joint. That will mean the long portion of the sheetmetal cover will be to the rear (a lot to think about for a silly clamp). Useing this I slipped the proper clamp on each side of the muffler.
Starting on the left side, I checked the gasket for any wear or damage. Slid the gasket on dry and coated the threads of the studs with anti-seize.
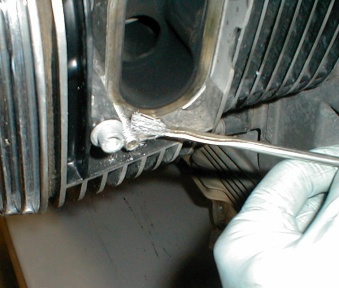 |
Coating the studs at the head. |
Before slipping the header into the muffler, I coated both the contact surfaces with anti-seize. After lining up the header with the muffler and the head studs, I slipped them together (this also required tilting the muffler slightly). One hand on the header and the other hand on the muffler, I pressed them together until the muffler mount was in the middle of the frame pins. Fit the washers and threaded the nuts on the header studs and snugged them down (remember the 13mm deep socket?). Slide the muffler clamp to its correct position (with stud or threaded portion facing down) and snug down the nut.
The second header or right header is a lot easier to put on as the muffler is tight and in the finished position. Coat the contact areas of the header and muffler, check and fit the gasket and fit the muffler clamp. Slide the header into place, fit the washers and nuts on the header studs and snug them down. Position and tighten the muffler clamp. Torque values: the header nuts to head @ 18 foot pounds and the muffler clamp nuts @ 41 foot pounds.
Lastly, that pesky O² sensor. Remember recording how many turnes it took to unscrew the O² sensor? Well to get the sensor back in I had to remove it from its bag, coat the threads with anti-seize (being careful not to get any anti-seize on the sensor's tip). Twist the wires of the O² sensor like I had just unscrewed it 4 turns, thread the sensor back into the mufflers cross over and tighten it. Now let me think,... "Yes, it's done!"
Copyright © 2009 Pokie Parmidge