 |
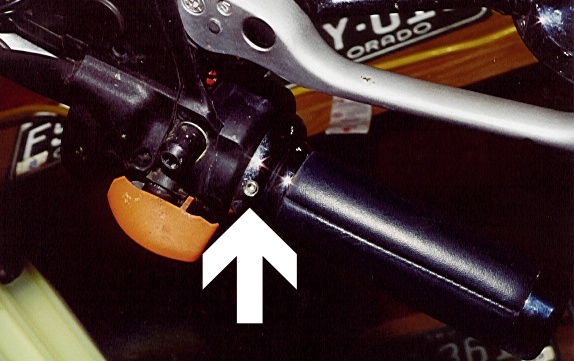
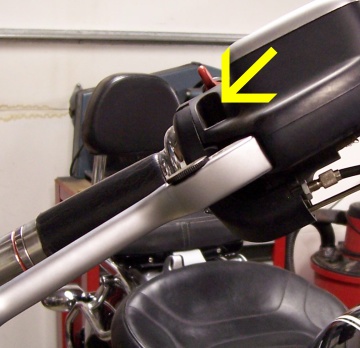
Setscrew holding on the left grip tube. |
(Getting A Grip)
Pokie, June 2007
For whatever reason, new grips or heated grips, it’s nice to know how to get the darned things off. I haven’t had a heck of a lot of success getting the “grips” off the tubes but I can at least get the “grip tubes” off the bike. This is how I do it.
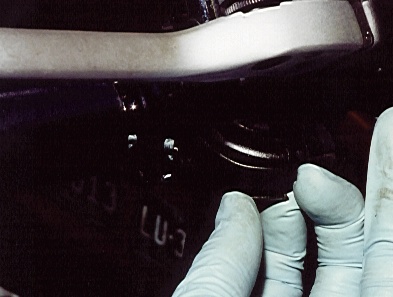
Getting off the left grip tube is the easy one. Somewhere on the chrome ring, between the switch and the grip (usually on the bottom) will be a hole with a setscrew in it. With the aid of a 2.5mm hex key, turn the setscrew counter clockwise (to loosen) and the grip will slide right off. Yup, it’s that easy, unless you have heated grips.
|
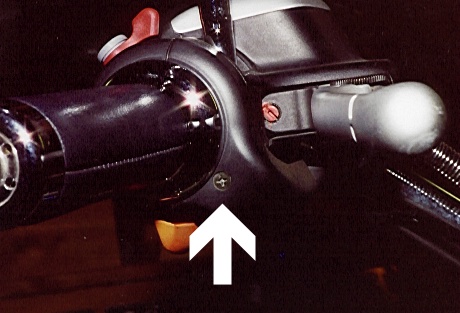
Setscrew holding on the left grip tube. |
To remove the throttle side grip tube is a little more involved but with a little logic applied, it’s not such a bad job either. On the bottom of the switch unit, there’s a lump of plastic with the throttle cable coming out of it. In the middle of said lump (cable guide) there is a Philips head screw, this holds on the guide cover.
 |
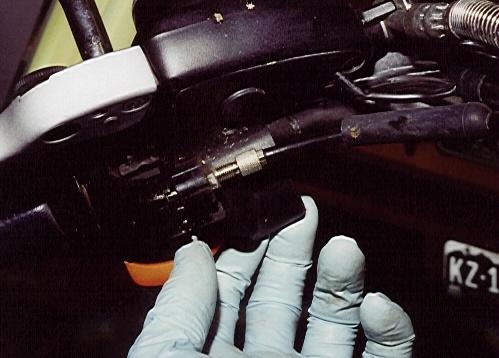
Cable guide screw. |
With this screw removed, the guide cover will still feel secure. Slip your fingers behind the cover where the throttle cable comes out and gently “pop” the cover away from the cable guide. Once the cover has popped away from the cable guide, it will fall off.
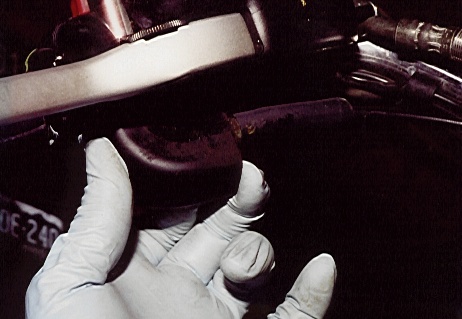 |
Slipping your fingers behind, pop the cover off. |
Next to come off is the bottom dust cover. This cover is held in place with two Philips head screws (one close to the middle and one at the leading edge of the lever assy.). With the screws removed, tuck your fingers under the joint below the switch and pry the cover down and forward. Before the cover is completely off, note the wire position for the front brake switch and how it goes through the cover. After slipping the cover out, it’s helpful at reassembly to note the little hook on the cover and how it fits into a little notch in the handlebar hinge (or lever assembly if you prefer).
 |
Lifting away the dust cover. |
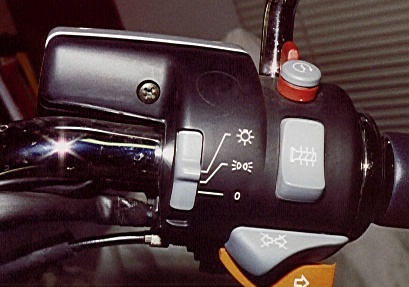
It’s now time to remove the large switch bank from the handlebar hinge. (If only the switch bank needs to come off, the previous mentioned dust covers still need to be removed as one of the dust cover screws also holds the bottom of switch bank.) Remove the obvious Philips head screw from the face of the switch.
*Please note that on bikes manufactured after 1998, an additional screw was added. To access this additional screw the mirror must be removed as the screw is right behind the mirror stem at the top of the lever perch.
 |
Once the mirror is removed, the hidden screw becomes visable (even though my picture is too dark to show it, it's there). |
The way the switch is designed and fitted, the switch will have to be wiggled until it is loose enough to curl down off the brake hinge. With the switch now loose and floppy, it is helpful (here as well) to note the little hooks on the back of the switch that help keep it in place. Now that the switch is out of the way, it becomes obvious how to adjust the location of the hinge (with the help of a 4mm hex key). At this point the only thing holding the throttle tube in place is the throttle cable and guide.
 |
Ready to remove the switch. |
Slip back the throttle cable adjuster “dust boot” and loosen the adjuster lock nut (10mm open end wrench). While pulling the throttle cable out of the adjuster with one hand, unscrew the adjuster all the way with the other hand. With the adjuster unscrewed all the way, lift the cable out of the guide. Now it’s just a matter of lifting the cable up and slipping the nipple out of the hook on the throttle tube.
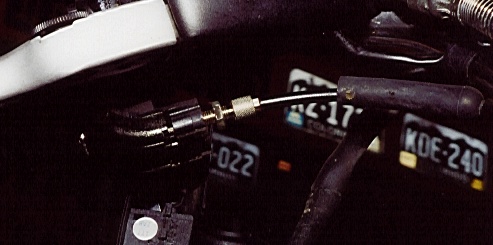 |
Dust boot off, loosen the adjuster. |
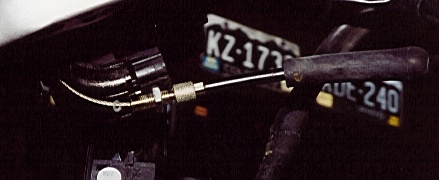 |
After unscrewing the adjuster, lift out the cable. |
Last thing to remove before the throttle tube will come off is the cable guide. Hook your fingers under the edge of the cable guide and pry it out. Once the cable guide “pops” off it’s pins, it can be lifted away. The throttle tube may now be slipped from the handlebars. Something to note about the cable guide on reassembling, the cable guide also acts as the throttle stop and will not “snap” back on until the throttle tube is in the correct position.
 |
Hooking your fingers, pop off the cable guide. |
Reassembly is to simply follow the reverse order with one or two small “wrinkles” kicked in. When re-fitting the throttle cable adjuster, allow about 2mm free play. Be careful not to over tighten the adjuster lock nut as these threads are only in plastic and will strip easily. Make it snug, not tight.
When re-fitting the handlebar switch bank, lower it over the throttle cable hook first (on the end of the grip tube) to help locate it. Press the switch home on the top first then pivot it down onto the bar towards the bottom (remember those hooks?), the pivoting motion helps to seat the hooks. At this time, check to see the wiring is tucked neatly away under the handlebar. I like to go ahead and put the screw in the face of the switch in but leave it loose.
Slide the dust cover into place (making sure the brake switch wire is well positioned) and the hook (again, remember the hook?) is properly positioned. The short, fat screw goes in by the brake switch wire while the long skinny screw goes in under the turn signal switch. With everything properly placed, snug up all three screws (again, don’t over tighten). Almost done, next slip the throttle cable cover into place and “snap” it down to the cable guide. Fit the Philips head screw and snug it down. Lastly, slip the dust boot back over the throttle cable adjuster and your done!
Twist your throttle once or twice to check your work. See, nothing to it!
Copyright © 2009 Pokie Parmidge