Fast Idle Plug?
(Not really)
I can't say that I've ever had a problem with my bike stalling. Most of the bikes I've owned over the years weren't even set up to idle. I was intrigued when my dealer announced he had something called a "high idle plug (BMW part number 61 36 8 366 282)" for a BMW R1200c. I don't know how many of them he got but he wanted me to fit one just to see what one actually did.The cost of the plug is quite cheap but puting it in place will cost you about one to two hours in labor. What I will try to do here is to show how I put mine in and what sort of changes to my bike's performance I have felt.
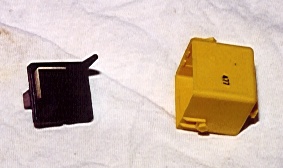
Back home in my garage, curiosity took over. I had heard people calling this item a "high idle relay" rather than a plug, so what was it really? I have to admit that it has the outward apearence of a relay as it has a relay top on it, but once the top is removed, all is made clear. With the top off, there are no internal parts other than a simple jumper strip of metal going from one spade to the other. That's it, no magic.
|
Idle plug with the top off. |
Ok, now the hard part, putting it in. The idle plug goes in its own special socket, only problem is, it's under the tank. So, you'll have to start off by removing the gas tank. If you aren't sure how to remove your tank please see my article "Tank Off."
With the gas tank off, you need to get down to where the socket hides. The socket is in the electrical junction box, under the Motronics unit. Start off by clipping the tie strap that holds the wire running beside the Motronics unit. Unplug this wire by pressing in the metal clip on the plug and pull the joint apart. Just let the two ends dangle.
Next, unplug the big plug on top of the Motronics unit. The first time you unplug the Motronics unit it is a little bit tricky, but the next time it will be easy. Pull the metal clip out (on the right side) with your middle finger and push the plug up with your thumb. Continue lifting the right side of the plug until it is almost clear of the socket. Now move the whole plug to the right side to unhook it from the catch on the left. Once the plug is clear of the socket, just let it dangle as well.
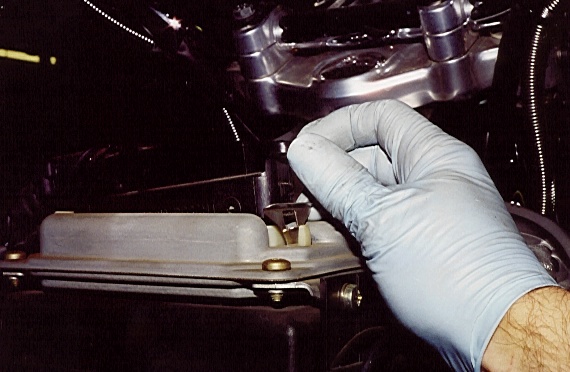 |
Metal clip pulled out, push the plug up. |
To get off the Motronics unit, remove all four philips head screws at the edges, (there is a ground wire under the front left mounting screw, so make sure that it gets put back when reassembling). When all four screws have been removed, the Motronics unit can be carefully lifted away. Set the Motronics unit where it won't come to grief, being extra careful not to drop it!
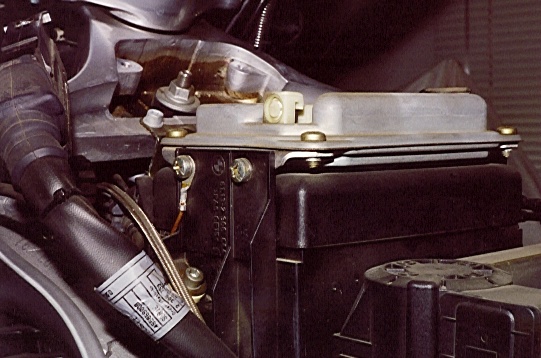 |
Note the ground wire and don't forget to hook it back up. |
Under the Motronics unit, you will see a big black box resembling a battery: this is the electrical junction box. After lifting the top off the junction box, you will see a maze of wires. Along the bottom or back of the junction box will be a bank of relays with a blank socket on the left side. This blank socket is where the "fast idle plug" goes. Using the keys on the sides of the fast idle plug to locate it's position, press the plug in until it "clicks" into place.
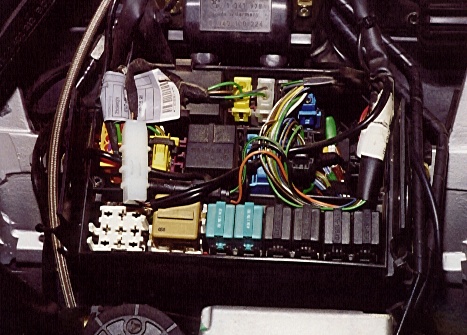 |
A look inside the wiring junction box. The white socket in the lower left corner is where the idle plug goes. |
Refit the top of the junction box and the Motronics unit (did you remember that ground wire?) If you forget which way the Motronics unit goes on, just remember the metal clip for the big plug on top is at the right. Hook the Motronics plug on the left and press it down. If the plug doesn't slip in fairly easily, back up and try again. Press down the plug until the metal clip "snaps" or "clicks" into place.
Re-attach the little plug and socket beside the Motronics unit and strap it back into place. Before you are completely done, you need to make the computer recognize the new map. This is done by disconnecting the battery's ground and turning the ignition on and off a few times while the battery is disconnected. You are doing this to be rid of any possible electrical charge in the system. With no electrical charge left in the system, when the computer re-boots, the new map will be recognized. You may now re-attach the battery. If all is going well, refit the gas tank as well and call it done.
Performance changes
When you restart your Cruiser, all will seem the same in both running and idle speed. Where the real difference occurs is when you start riding. With the Motronics reading the new map, when you close the throttle, the return to idle is no longer instantaneous. The new map will instead return to idle in steps, stopping the decceleration from going past idle and into the stalling zone. Kind of reminds me of the "dash-pots" my old VW had.
Copyright © 2009 Pokie Parmidge