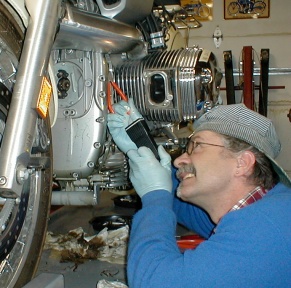
Oil Leak!
Pokie Parmidge
January 2004
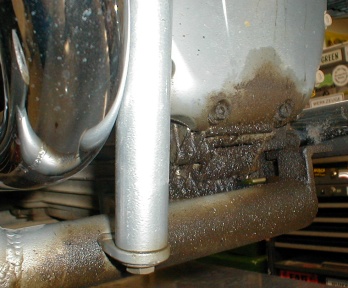
From day one James ('98 BMW R1200c) has been a leaker. The spot at the bottom of his timing cover is always covered with oil and by riding him, the road dirt turns this area into a black mess of goo. When I first noticed the leak I tried tightening the bolts on the timing cover, they were so loose it's a wonder I didn't lose them! I was hoping tightening the bolts was going to solve my drip but it just wasn't to be.
|
Always impressive looking. |
After spending a couple of years being careful where I parked the little drip, I finally got around to resealing the timing cover and here's how I did it.
On these new motors, (when you're used to things like /5's and /2's, this motor is new) things like the timing cover and the engine halves don't use gaskets. I don't much like the idea of no gaskets, that's one of the reasons older English bikes leak. If that's the way BMW designed it, who am I to question it? Then again, I don't see BMW out here trying to stop the leak either. Enough complaining, let's get to work.
First off, I can't seem to work on anything dirty, it's just way too depressing. If it was summertime I could just drag the bike out to the street, Gunk (spray degreaser) it up and wash off all the filth with the garden hose. Like I said, if it was summertime. But it's only 21 degrees outside and the garden hose is frozen solid (another thing I forgot to do). Instead, I placed a large drain pan and newspapers under the bike and scrubbed the front and bottom of the motor down with kerosene (no smoking please). A half a cup of kerosene, a small brush and some Q-Tips had the bottom of my engine looking like new!
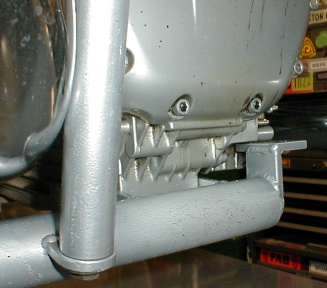 |
Clean as new,... well, almost. |
Next step was to drain the engine oil and remove the oil filter. A 4mm hex key to remove the four bolts holding on the ignition cover and horn (the two longer bolts are for the horn mount). Bolts out, lift the horn forward and out of the ignition cover. The ignition cover comes off pretty easily, just slide it down and out. To remove the horn, just pinch the spring clip at the top of the plug and wiggle the plug off.
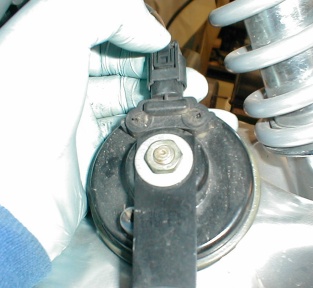 |
Pinch and wiggle to remove the horn plug. |
Faced with the alternator belt, using a 13mm box-end wrench and socket with ratchet I removed the two nuts and washers from the top and side alternator mounts, then the remaining bolt. Once all three of these are off, it's just a matter of pushing the alternator all the way down and slip off the belt.
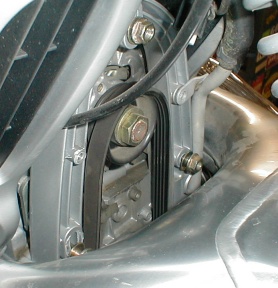 |
The alternator belt comes off. |
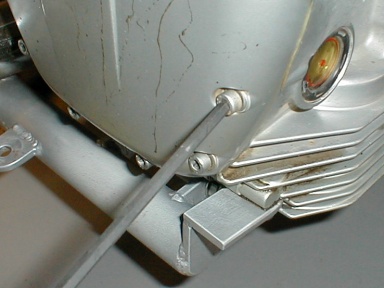
It was right about now that I realized the return pipe for the oil cooler was going to have to come off before I could go any further. The not so great thing about removing the return pipe is the left exhaust header gets in the way of removing the banjo bolt at the bottom. I used a 15mm open-end wrench to loosen the muffler clamp (after liberally spraying the whole works with WD-40, be real careful not to spray the O2 sensor on the cross over). With the help of a 13mm deep socket (so-as not to damage the chrome) I removed both nuts and washers holding the L/H header to the head. Clamp loose, nuts off, wiggle, wiggle, wiggle until the header comes free (I resisted using a rubber mallet as it could damage both the header and the chrome).
 |
Banjo bolt behind the header. |
Now that the header pipe was off, the banjo bolt on the oil cooler return line was now accessable. I had to do a bit of local cleaning as the header pipe covered a little pocket of filth around the banjo bolt. A 22mm socket made short work of removing the banjo bolt. If you decided to try to do this job without draining your engine oil, well, you will now have a big mess on your hands as the banjo is well below the level of your engine oil!
 |
Removing the banjobolt . |
When I pulled out the banjo bolt, I had to keep track of the crush ring on each side of the banjo. These crush rings can be re-used if they haven't been squashed too thin, deformed or have developed ridges. For the price, it's really better to just replace the crush rings.
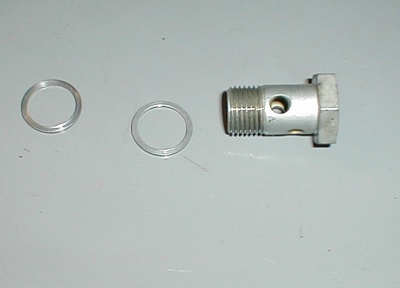 |
Banjo bolt with crush rings. |
To remove the return line, I pinched the clamp together at the top, slip the clamp up the line, then forced a bit of oil up the side of the rubber line to free up the seal on the metal line. I used a small, dulled screw driver covered with oil to achive this, being real careful not to damage either line. Once the seal has been broken, it's a simple matter of giving the metal line a turn and slide it out of the rubber hose.
 |
Pinching the hose clamp. |
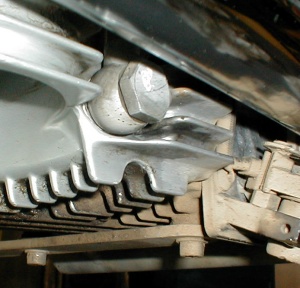
Going in further, I needed to remove the crank bolt. I guess the best way is to use the "pin in the flywheel" method BMW suggests, but I don't have one. Instead, I had to opt for a more simple method. One way is to put the bike in gear and undo the bolt while putting pressure on the rear brake (thus stopping the engine from turning), another way (which worked well for me) is to put a 16mm socket on a breaker bar, rotate the engine until you feel compression, then rap the breaker bar with a hammer (counter clockwise). One rap and the bolt was loose enough to back out with my fingers.
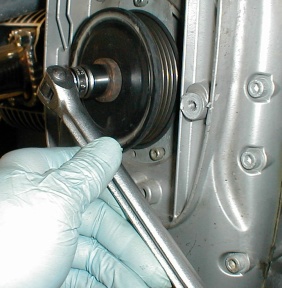 |
Preparing to undo the crank bolt. |
After removing the crank bolt and washer, the pulley and timing rotor will lift right off with no resistance. The timing rotor will be stuck to the pulley (with Loc-Tite) don't break them apart if you don't need to.
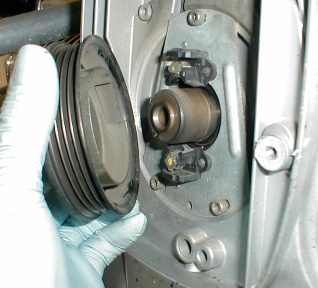 |
Lifting off the rotor and pulley. |
To do this job, the ignition plate doesn't need to come off but I took mine off anyway just to be able to see the condition of the crank seal. I noticed on the plate some marks that seemed to indicate the plate had been off at some point. I liked the way my bike ran before taking it apart so, for my own reasons I went ahead and put two lines across the plate and case with a felt marker just so I could put it back in the same location. I used two marks to reduce the chance of paralax error. I then removed the three screws holding the plate in place (using a 4mm hex key) and lastly the bolt and strap holding the ignition wire onto the cover.
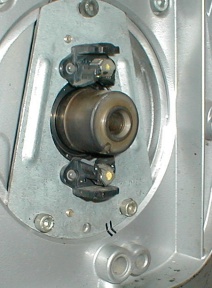 |
Marking the plate and case before removing the ignition plate. |
Here I also did something a little different from what BMW suggests to do. BMW suggests undoing the telelever arm from the engine and pushing the forks forward to gain more room to remove the cover, well , that just seemed like way too much work. Here's what I did instead; I dug through my selection of used metric bolts and found some really long 6mm bolts left over from some Honda, Yamaha, Suzuki or Kawasaki I'd worked on in the past. They don't have to be quite this long but the ones I used turned out to be 105mm long. I removed one bolt off each side of the timing cover (about half way up) and threaded these really long bolts in. Once the long bolts were threaded in (about three or four threads) I went ahead and removed all the remaining screws (5mm hex key). All the screws (all 16 of them) are the same length and size so don't worry about getting them mixed up (each screw has a washer). The only odd-ball screws here are the two upper ones, they will require a 6mm hex key to remove. With all the screws out (except the really long ones) the cover is now ready to come loose.
 |
Removing the cover screws. |
To loosen the cover (after you are really sure all the screws are out) use a large flat object like a prybar between the timing cover top and the frame, wiggle lightly until the cover starts to free up. Never, never pry with anything between the mating surfaces of the cover or engine case or damage will result! Once the cover starts to come loose, wiggle the cover with fingers only until it slides off the engine and along the long bolts. Slide the cover as forward as you can (which will only be far enough to clean off the old sealing material from the cover and the case). The long bolts will support the cover so the crank seal won't get damaged.
 |
Cover slid forward on the "really long" bolts. |
To clean the sealing surfaces, you will need time, patience and some tools like thin screwdrivers and needle nose pliers.
When I felt I had removed all the old sealer, I used bits of tissue to wipe out any blobs or drips of oil. I also allowed to case to stay open over night to allow any oil to freely drip out. Next morning I again daubed out any oil that pooled or dripped with tissue and paper towels. Next wiped down all the mating surfaces of the cover and engine block.
 |
Picking out old pieces of sealer, did I say it was easy? |
Everything was going so well until I tried to secure some of the special sealer BMW says to use to put things back together (3-Bond 1209, a Loc-Tite product I suspect that has been re-named just for BMW). I had some trouble buying it, heck, I had trouble finding it! Calling BMW wasn't much help, even the BMW car dealers didn't have a clue what I was asking for. I then tried calling the independent auto stores, even the special Loc-Tite number was coming back empty. When the pros were coming back scratching their heads I knew I just needed to take action myself. Any of the bikes I'd worked on as well as my VW, where there was no gasket I just used silicone sealer, why should this be any different? So that's what I did.
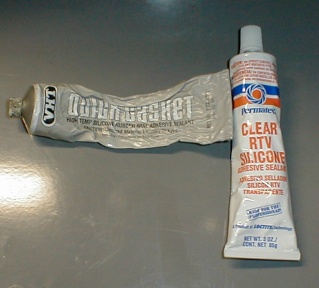 |
Two kinds of sealer, I used the Permatex Clear RTV. |
I had a brand new tube of Permatex Clear RTV (made by Loc-Tite) ready for the job at hand. My system of just moving the cover forward allowed just enough room to both clean and smear the new sealer on. I would put a blob of sealer on my finger, smear it around with my thumb then apply it to the sealing surfaces. It was hard to see where I had smeared until I developed this kind of smear then daub with the tip of my finger. The daubing action would dull the surface so I could see what was done and what wasn't. Each bolt hole on the timing cover needed to have more sealer as each hole has a circle around it that is counterbored, giving me the impression that this is where a seal is formed. When I was sure I'd coated all the mating surfaces, I smeared the crank nose and step with grease to help the seal slide over the crank. Then slowly slid the timing cover back in place (wiggling the cover slightly where the seal contacts the crank) and the cover was home.
Before putting any of the screws back in, I put a smear of anti-seize on all the threads and a daub of RTV on the shaft to help with sealing. Threaded in all the screws finger tight then using a cross pattern snugged them down. The 6mm bolts should be torqued to six foot pounds while the 8mm bolts need 15 foot pounds.
Next I lined up the marks on the timing plate and snugged down the three retaining screws. Slipped on the trigger unit/ crank pulley and threaded in the crank bolt (checking to make sure the trigger unit was staying on it's locating notch on the front of the crank). Just like taking it apart, put the bike in gear and torque the crank center bolt (37 foot pounds) while pressing on the rear brake pedal.
Now was a good time to put the oil return pipe for the oil cooler back on. It was pretty straight forward, slipped it back into the rubber hose and twist until it lines up with the mount near the bottom. Wipe any dirt from the sealing surfaces of the banjo and the engine block. Fit a new crush ring on either side of the banjo, slip in the bolt thru and thread it into the case. I torqued the banjo bolt to 26 foot pounds. Finished up the oil cooler line by re-fitting the hose clamp on the rubber hose at the top with a pair of pliers.
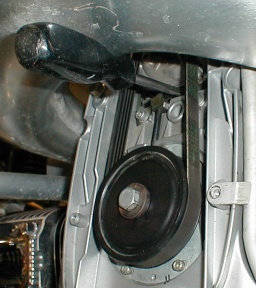
Before fitting the alternator belt, I turned the belt inside out to look for wear or damage. If I had seen any cracks in the ridges of the belt I would have replaced it. Mine looked just fine, so back on it went. Loop the belt onto the crank pulley (big one) first then slip it over the alternator pulley.
This is the way I used to adjust the alternator drive belt, all from the front! I made sure I would be ready to tighten the mounts, so I layed out a 13mm open end wrench, 13mm box end wrench and a 13mm socket on a 1/4 inch drive ratchet in reaching distance. Slide the bolt back in and thread on the two nuts but leave them loose. I take out the minor slop by tucking a screw driver between the alternator body and the engine block (being careful not to pinch the ignition wire) and lightly press them apart.
 |
Prying between the alternator body and engine case. |
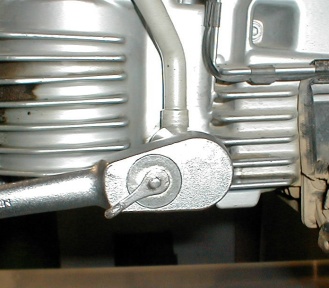
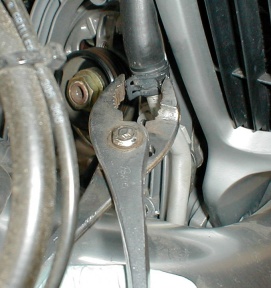
When I feel I've got the belt as tight as I can get it without bending the screw driver, I'll hold it while tightening the top mounting nut and the side bolt (L/H while looking straight at it) of the alternator. To get the final adjustment, I use a lightly modified 19mm open end wrench (it fits a little sloppy but works just fine). I offered the wrench up to the adjuster just behind the R/H lower mount (as you look straight at the alternator). My wrench wouldn't quite fit in the space, so I took it over to the vise and gave it a little tweak with a dead blow hammer.
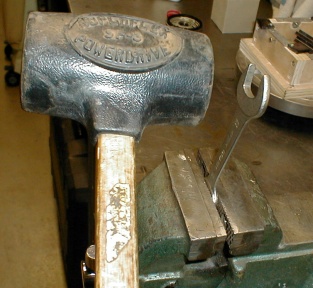 |
Tweaking the 22mm wrench. |
With the wrench in place on the adjuster, (the adjuster is a rack and pinon set up, the adjuster is the pinon) I loosened the mounts again. I then lifted the wrench until the belt was pretty darned tight. While holding the belt tight, with my other hand I tightened the upper alternator mount and the R/H mount. Removed the 19mm wrench and tightened the final mount. To check the belt fit, I rotated the engine several times by hand to see if there was any changes (remembering to take the bike out of gear).
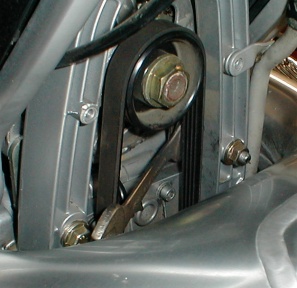 |
22mm wrench on the adjuster, the wrench was bent to clear the alternator belt. |
I refit the belt cover, horn and exhaust pipe. With the replacement of the oil filter and engine oil, James was back up and running without ever having to take his gas tank off!
Copyright © 2009 Pokie Parmidge