 |
Loosening the rear wheel. |
Replacing Your Brake Pads
Pokie May 2002
Replacing the pads on either wheel is fairly easy and shouldn't have you running for cover at the thought of having to do it. In my opinion, the front pads are easier to replace than rear but all in all will take about the same amount of time. Because there's only one caliper on the rear, I guess I'll start there.
Rear Pads
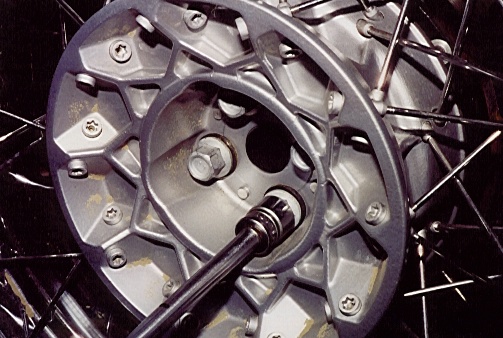
To remove the rear caliper, the rear wheel will have to be loosened so make sure your bike is held securely. Shift the transmission into first gear. Turning counter-clockwise (with a 17mm socket and breaker bar), loosen the rear wheel lug bolts (about one full turn each). I will be using my BMW service stand but in a pinch, this can be done on the side stand. If you have no choice and have to loosen the rear wheel on the side stand, please be very careful.
|
Loosening the rear wheel. |
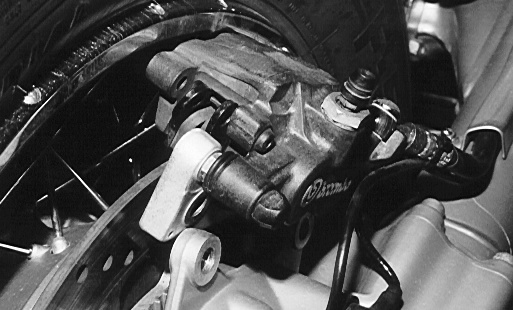
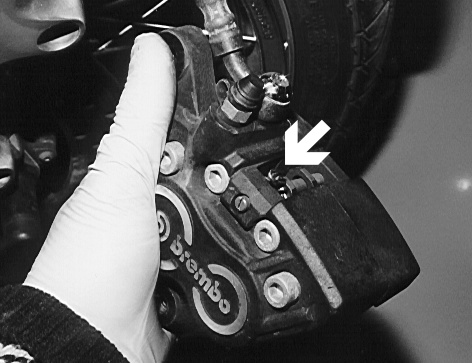
The desire to undo the bolts holding on the rear caliper is very strong but at this point you need to resist. Before you undo the caliper bolts, remove the pad pin circlip (yup, that little, tiny circlip close to the top, rear of the caliper) and drift out the pin.
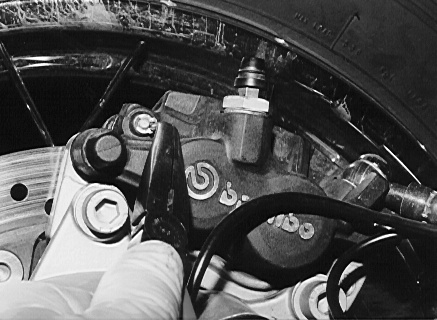 |
Removing the pad pin circlip. |
While tapping out the pin, watch you don't accidently tap it into one of the wheel spokes.
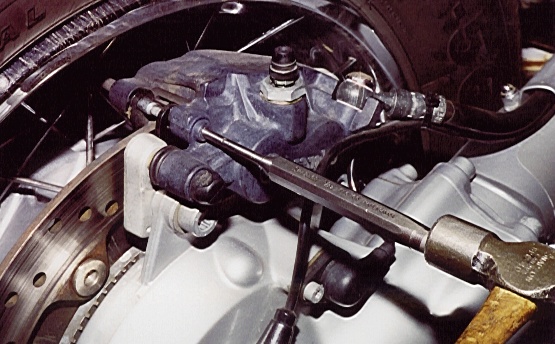 |
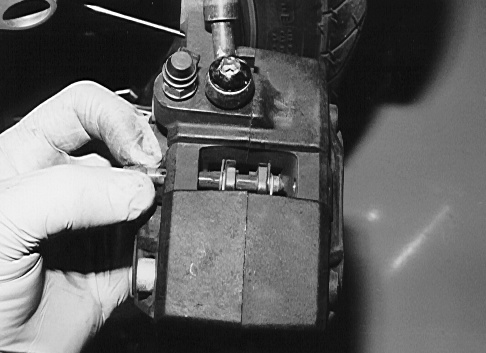
Tapping out the pad retention pin. |
When you first start tapping on the pad retaining pin it may feel a little springy, this is just the spring ring on the pin absorbing some of the shock. Try tapping a little harder and the pin will break loose. With the pin almost all the way out, reach between the spokes and slip the pin the rest of the way out with your fingers.
Now undo and remove the two caliper retaining bolts (I use a 8mm socket hex key on a breaker bar). Often these bolts will be tight, you may have to snap them loose (turning counter-clockwise).
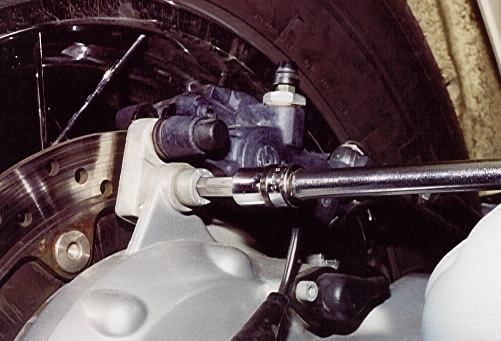 |
Removing the caliper bolts. |
Lift the caliper straight up (you may have to hold the rear of the pads from dropping down as you lift the caliper). When the caliper bumps against the rim, twist the caliper (top to bottom) to push back the pistons as far as possible (to get more room). If necessary, loosen the wheel a little more to make enough room to slip the caliper off the disc and out.
 |
Twisting and slipping out the caliper. |
Turning over the caliper (without undoing and hoses or wires) the old pads will lift right out. If your pads fell out and you are not sure how they go back, just remember the metal backing plates go to the outside and the fibre faces face each other on either side of the disc.
Before fitting the new pads, look over the caliper for any leaks. Clean off the pad retaining pin and lightly lubricate it with some anti-seize or multi-purpose grease (just a very light smear, all we are trying to do is to ease assembly and reduce corrosion down the road). If while you are working a little shiny flat spring falls out, not to worry. This flat spring is just for putting a bit of pressure on the pads when they are not being used to stop them from flopping or rattling about. While holding the caliper upside down, refit the flat spring and the new pads.
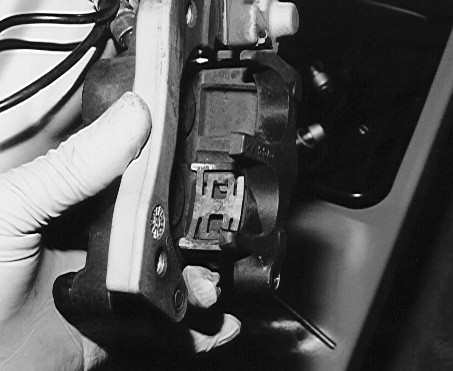 |
The flat springs position before the pads go in. |
Hold a bit of pressure on the pads against the flat spring and slip the retaining pin in as far as you can push it with your fingers. Using a small hammer, tap the pin home. Refit the circlip before you forget it.
 |
Tapping in the pin. |
Spread the pads as far apart as they will go (use a large, flat screw driver to pry them apart--being careful not to damage them). Slip the caliper past the rim and onto the disc (some wiggling and more loosening may be required here as the new pads will be considerably thicker than the old). Refit the caliper retaining bolts (after putting a smear of anti-seize on the threads) and tighten them down. It may be necessary to pump up the brake as the pads will need to be brought up to the disc, this is not unusual. Turn and tighten the rear wheel (if you did this job on the side stand, recheck the lug bolts tightness after a few miles), check your brake fluid level and take a test ride.
Front Pads
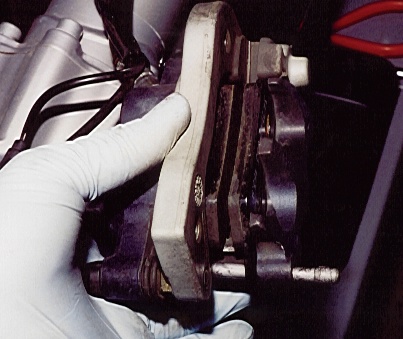
Removing the front calipers is pretty easy but may I suggest you only remove one at a time. Simply remove the two bolts holding the caliper in place (will require a 8mm hex key socket and breaker bar) by turning counter-clockwise. Upon removing the bolts, simply give the caliper a side to side twist (to press the pads apart) and lift it off the disc.
 |
Removing the front caliper. |
Replacing the front pads isn't hard, just a little fiddly. This is a good time to look over the pads and how they are held in. To remove the pads, the pad retention pin has to come out.
 |
Pull the wire circlip. |
Remove the circlip then turn the caliper around and drift out the retention pin from the back with a small hammer. Once the pin is out, the pads will fall out.
 |
Slipping out the retention pin. |
To fit the new pads, just follow the reverse order. Clean and lubricate the retention pin with a light smear of anti-seize or multi-purpose grease to both ease assembly as well as reduce corrosion. Set the new pads into place (if there isn't enough room for the pads to fit, put the old ones back in and pry them further apart with a large screw driver) press in the retention pin and fit the circlip.
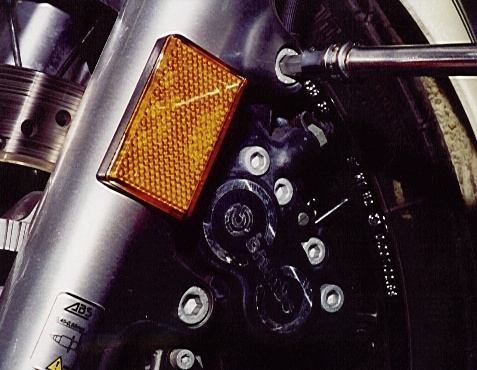
Spread the pads as necessary to slip over the disc. The bottom of the caliper sits in a little recess on the fork leg. Once the caliper is in position, put a smear of anti-seize on the threads of the bolts, fit them and tighten them up. It will be necessary to pump up your brakes to bring the new pads up to the disc, this is not unusual.
Following thes same steps, attack the remaining front caliper. When you are happy that everything is done and tightened up, check your fluid level. If you need to top up your fluid level, remember not to drip on your paint, BRAKE FLUID WILL DAMAGE YOUR PAINT! All done? TEST RIDE!
Copyright © 2009 Pokie Parmidge